An introduction to creating Swift Command Line Tools
Why use Swift for Command Line Tools.
Swift CLI Tools make it easy to do tasks that are repetitive, or don’t require human interaction. As you will see Swift CLI Tools aren’t this dependencies filled projects that is too often shown in tutorials. We will be using everything provided to us in the Standard library, and the Coco framework provided by apple. Swift CLI Tools are very powerful, we can generate Xcode projects with boilerplate code, and even keyboard, and mouse tasks. Your imagination is the limit here.
How to get started
Create a command line tool Xcode project
2. Open the main.swift file and have at it.
main.swift
Write all your code in the main.swift file. This file will execute on the command line. In the Xcode project the command line is displayed where you usually see the console printouts.
Printing to the command line
Printing to the CLI has never been easier, just use the Print statement just like you would when printing to the console on any Xcode project. Giving specific instruction is very important, look at the print statement as a way to tell the user what options they have, and how to use your script.
Getting user input
Getting user input simply requires one function that captures the keyboard input, and saves it as a string which you assign to a variable.
Getting user input
The function above gets the user’s input, however when you want to use this function simply assign it to a variable like shown on line 16. Since scripts are procedural when you assign this function to a variable the user must enter their input at this specific step of the program flow, so be careful where you place this variable. To avoid user error I also made the string lowercase.
How to generate Swift file, and ask user where to save it
First we need to print to the console the options to where the user can save the file.
Printing save options to CLI
As you can see we give users the number of the item thus making it easy to understand which option to select. The key in Command Line interaction is to ask the user for as little input as possible.
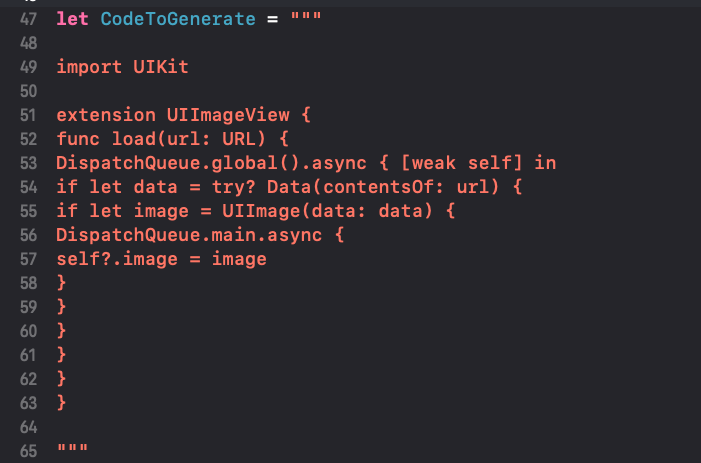
2. Now we need to create the variable with the string containing the file contends.
File contents String
Our string is a multiline String. As you have seen this is the second time we use multiline strings. They are useful when making Command Line Tools because you can use spaces, tabs, etc without using the string terms such as \t or \n. This string is the contents of our file. This string contains a extension for UIImageView.
3. Now we need the logic for the user to select file location.
User selection logic
Now we take advantage of that user input variable we created earlier, and start creating the logic for where to save the file based on the users choice. First we need a variable to store the file location which is on line 18. This line of code creates a variable which uses FileManager to store the file location. FileManager has its own type for file storage which we will use. Now we create some if statements to set the file storage based on the users choose. As you can see if the user selects 1, 2, or 3 we set the dir variable to the appropriate file location, and print a statement that says the file was saved.
4. Now we create the function that saves the file.
Function to save file
The code above calls our dir variable and saves the file to the appropriate location. The function takes in a few variables which we will talk about in the next step.
Calling the function to the save file
At the end of the main.swift file we call our function that generates the file. The function takes in a few variables. First we give it the string containing the file contents, however we convert it to Data so that it conforms to type Data. second we set the file name. The file name must contain the extension, in this case we are generating a swift file so we name our file Extensions.swift.


